Media Aliases in Sitecore 8.2 Update 1

read full post

With recent release of Sitecore 8.2 Update 1 we have got a really much fun on Azure and getting closer to PaaS. it was so much buzz about it at #Sitecore Twitter, so that another handy feature has been overlooked. I am now talking about Media Aliases in Sitecore. One would probably ask few questions about that;

- Haven't we had it previously in Sitecore, wasn't that doable in principle?
- It wasn't, at least not out of the box. Previously if you wanted to achieve that functionality you had to implement your own ItemResolver pipeline processor and combine that with MediaProvider so that the links to media items were generated using aliases. That required custom code being built and re-deployed, that was especially painful for solutions already live. Of course such an approach couldn't be called an easy way.

- But why at all do I need Media aliases?
- Good question. Why would you use normal aliases with Sitecore then? You may find yourself working with the platform for few years so far without even thinking about that functionality. However otherwise like me, you may have a SEO Maniac as your manager (in good sense of word "maniac", for sure) who constantly generates optimization tasks for you. In my case I also had a Marketing Department who wanted to have nice and simple URLs for certain features, so that they can easily tell that over the phone.

- Still didn't get that. Would it be better just to demonstrate an example of very obvious use case?
- Without any problems. For the sake of this experiment, I have installed clean vanilla Sitecore 8.2 update 1. With that instance, I want to host my professional CV and easily tell that URL to numerous employment agents so that they could get that URL straight away or even remember it. I also want to make it as simple and minimal as possible. So that people type an URL and immediately get the PDF document downloaded. And of course, I don't want to have any file extension in URL or anything that complicates.
That is an ideal scenario for implementing Media Alias. It is indeed very easy, below are few steps how to make it work:

  1. Navigate to /Sitecore/System/Aliases and create a new child item of type Alias. Give the item simplest name you can, but avoid that name matching any of existing pages, as in that case alias would take a priority and a page becomes unreachable.
  2. While editing alias item, click Insert media link in order to open Insert media link dialog box.
  3. Select (or upload if required) correspondent Media Item that will be processed.
  4. Hit Insert button. That's it - your new Media Alias is ready
  5. Do not forget to publish your alias (and media item) so that it becomes available from Content Delivery database(s).


As soon as I completed these 5 steps, I can now able to download my CV in one click with nice and clean URL: http://sandbox/cv Also, I want to warn that Media Aliases have the same limitations as the normal ones.


That's it - nice, clean and simple.
I hope Media Aliases will help you to deliver even more user-friendly solution!

Helix project, MVC routing and the form posting back to controller. Part 3 - Adding validation

read full post

In previous post we have created an MVC form, that submits to a feature controller and set up the routing to make it all work. In this part we'll add validation to that form. This part does not differ from traditional MVC approach, however let's make our form smooth and complete.

1. Add validation controls into a page for each of inputs:

@using (Html.BeginRouteForm(MvcSettings.SitecoreRouteName, FormMethod.Post))
{
    @Html.LabelFor(x => x.FirstName)
    @Html.TextBoxFor(x => x.FirstName)
    @Html.ValidationMessageFor(x => x.FirstName)

    @Html.LabelFor(x => x.LastName)
    @Html.TextBoxFor(x => x.LastName)
    @Html.ValidationMessageFor(x => x.LastName)

    @Html.LabelFor(x => x.Email)
    @Html.TextBoxFor(x => x.Email)
    @Html.ValidationMessageFor(x => x.Email)


}
2. Model needs to be updated with validation action filter attributes, provided by DataAnnotations:
using System.ComponentModel.DataAnnotations;

namespace YourSolution.Feature.Test.Models
{
    public class TestModel
    {
        [Display(Name = nameof(FirstNameLabel), ResourceType = typeof(TestModel))]
        [Required(ErrorMessageResourceName = nameof(Required), ErrorMessageResourceType = typeof(TestModel))]
        [MinLength(3, ErrorMessageResourceName = nameof(MinimumLength), ErrorMessageResourceType = typeof(TestModel))]
        public string FirstName { get; set; }

        [Display(Name = nameof(LastNameLabel), ResourceType = typeof(TestModel))]
        [Required(ErrorMessageResourceName = nameof(Required), ErrorMessageResourceType = typeof(TestModel))]
        [MinLength(3, ErrorMessageResourceName = nameof(MinimumLength), ErrorMessageResourceType = typeof(TestModel))]
        public string LastName { get; set; }

        [Display(Name = nameof(EmailLabel), ResourceType = typeof(TestModel))]
        [EmailAddress(ErrorMessageResourceName = nameof(InvalidEmailAddress), ErrorMessageResourceType = typeof(TestModel))]
        [Required(ErrorMessageResourceName = nameof(Required), ErrorMessageResourceType = typeof(TestModel))]
        public string Email { get; set; }

        // Labels and validation messages: instead of hardcoded you may take it from Dictionary
        public static string FirstNameLabel => "First name";
        public static string LastNameLabel => "Last name";
        public static string EmailLabel => "E-mail";
        public static string Required => "Please enter a value";
        public static string MinimumLength => "Should be at east 3 characters";
        public static string InvalidEmailAddress => "please enter valid email address";
    }
}
3. Last but not the least, need to decorate POST action with validation action filter attribute, that runs validation prior to executing controller and returns validated view model on failure or runs into controller action if there no errors. So, updated controller action:
        [HttpPost]
        [ValidateModel]
        public ActionResult Test(TestModel loginInfo)
        {
            // do something on successful form submission
            return new RedirectResult("/SuccessfulResultPage");
        }
4. And of course, the ValidateModelAttribute class itself:
using System.Web.Mvc;

namespace YourSolution.Feature.Test.Attributes
{
    public class ValidateModelAttribute : ActionFilterAttribute
    {
        public override void OnActionExecuting(ActionExecutingContext filterContext)
        {
            var viewData = filterContext.Controller.ViewData;

            if (!viewData.ModelState.IsValid)
            {
                filterContext.Result = new ViewResult
                {
                    ViewData = viewData,
                    TempData = filterContext.Controller.TempData
                };
            }
        }
    }
}

5. After running gulp commands for updating views and DLL libraries, an updated page would do validation similar to:


That's it! Finally, our feature project named Test would have the following structure in Solution Explorer:


Thanks for reading!

Helix project, MVC routing and the form posting back to controller. Part 2 - Creating a form

read full post

In previous part, we created a test feature, as a part of a Helix-based solution. We also created a page and rendering and wired it together. So, now it's time to create a form.

As a start, let's create a controller, as it is referenced from rendering definition item:

namespace YourSolution.Feature.Test.Controllers
{
    public class TestController : Controller
    {
        public ActionResult Test()
        {
            return View();
        }
    }
}

Then create corresponding Razor view..

@using Sitecore.Mvc.Configuration
@model YourSolution.Feature.Test.Models.TestModel

@using (Html.BeginRouteForm(MvcSettings.SitecoreRouteName, FormMethod.Post))
{
    @Html.LabelFor(x => x.FirstName)
    @Html.TextBoxFor(x => x.FirstName)
    
    @Html.LabelFor(x => x.LastName)
    @Html.TextBoxFor(x => x.LastName)

    @Html.LabelFor(x => x.Email)
    @Html.TextBoxFor(x => x.Email)
}


.. and model that represents our form, to be passed between controller and view:

namespace YourSolution.Feature.Test.Models
{
    public class TestModel
    {
        public string FirstName { get; set; }
        public string LastName { get; set; }
        public string Email { get; set; }
    }
}

As we are working with a project outside of webroot, we need to use gulp in order to copy this view into corresponding folder on the website (or you may copy that manually), same for the feature DLL.

After refreshing browser you will see the view. Obviously, when trying to hit "Submit" button - nothing happens as there's no POST controller action method. So let's add the one:

namespace YourSolution.Feature.Test.Controllers
{
    public class TestController : Controller
    {
        public ActionResult Test()
        {
            return View();
        }

        [HttpPost]
        public ActionResult Test(TestModel loginInfo)
        {
            // do something
        }
    }
}

Still not there... why? Let's troubleshoot that. First thing to do is to find out where form does POST to. In webinspector, it shows:

  <form action="/test" method="post"> ... </form>

So far so good - that looks correct (form POSTs to itself). But how /test URL corresponds to YourSolution.Feature.Test.Controllers.Test() method of YourSolution.Feature.Test feature project?

That's where routing comes into a play. As you know, feature is just a single project that is built into individual DLL and is deployed into /bin folder of project webroot along with other libraries. So how do we wire up /test with that particular method?

We apply config patch Feature.Test.config in order to add a pipeline processor right before the one that initializes MVC routes.


After running gulp configuration task this patch will be put into YourSolution/Website/App_Config/Include/Features folder along with custom configuration include file patches for other feature modules. Corresponding processor will be the following:

using System.Web.Mvc;
using System.Web.Routing;
using Sitecore.Pipelines;

namespace YourSolution.Feature.Test.Pipelines
{
    public class RegisterWebApiRoutes
    {
        public void Process(PipelineArgs args)
        {
            RouteTable.Routes.MapRoute("Feature.Test.Api", "api/test/{action}", new { controller = "Test" });
        }
    }
}

Finally the last bit to make routing work - modify _ViewStart.schtml view file on the project level. Here is it:

@{
    Layout = (this.ViewContext.IsChildAction) || (this.ViewContext.RouteData.Values.ContainsKey("scIsFallThrough") && 
        Convert.ToBoolean(this.ViewContext.RouteData.Values["scIsFallThrough"])) ? null : "~/Views/Shared/_Layout.cshtml";
}

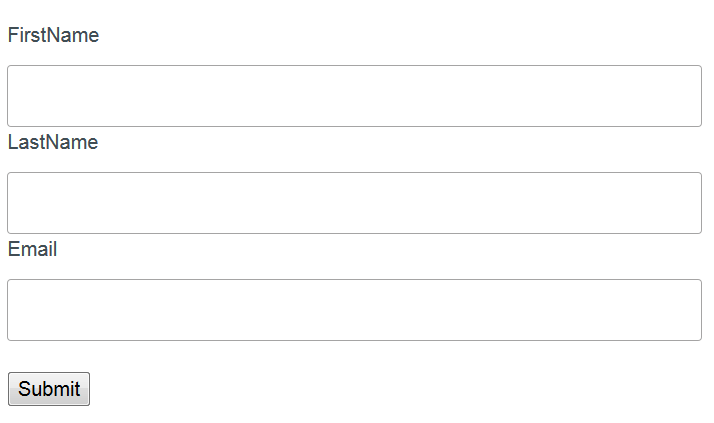
If you have done everything correctly, after gulp'ing your assets into web folder and refreshing the page in browser, you'll see a form similar to the one below:


That's it! Now the form is fully functional and POSTs to a controller, however in order to make things even better - let's apply form validation.

References:

Sitecore Helix Documentation


Helix project, MVC routing and the form posting back to controller. Part 1 - Prerequisites

read full post

At the moment I am working on challenging project that is powered by Sitecore 8.2and follows Helix principles.

Last week I implemented a Feature, that has an MVC form posting back to its controller (here I mean native MVC, not Web Forms for Marketers) module. "Not a big deal" - I thought initially... and spent more time that positively expected until finally got it implemented.

The difference between Helix project and more traditional Sitecore MVC application is that in Helix your assets - controllers, views, statics etc. are kept within an individual project for a particular Feature (or Foundation, or Project - depending on what functionality you're implementing).

Prerequisites.

I assume you already have your Helix solution ready (you may use Habitat, as an "instance" of Helix). So let's start with Sitecore.

I create a page called Test under website root using one of page templates. Next, a rendering is required to be assigned into a placeholder on a page. I create a controller rendering named Test and put it under this feature folder (also called Test). Please notice, that I have to specify controller with fully qualified name with a name of assembly where this controller resides.


Tip: do not forget to publish your items, unless you're working in a live mode from Master DB directly.


Next, let's create a project structure in Solution Explorer. As we're building a Feature, create a solution folder under Feature folder in Visual Studio and name it Test (as a feature name). Create a class library project within that folder following Helix naming conventions YourSolution.Feature.Test with the same namespace and assembly name. The easiest probably would be simply to copy project folder from an existing feature and change namespace / types there.


You need to have Web config to the project root. Please ensure you are referencing the same .NET version as set in Target Framework of the project, in my example it is 4.5.2:


Also you need to have web.config within the /Views folder to make IntelliSense work properly


Below is the minimum references you'll need to have. DataAnnotations library is not essential, for sure, but is included because it'll be needed at step 3):


At this stage we're set. Let's mote to the next step - creating and wiring up a MVC form on a rendering.

References:

Sitecore Helix Documentation

Sitecore London User Group Is Back

read full post

I am proud to announce that I have managed to find a sponsor for an oncoming Sitecore User Groups in London after a big half a year gap caused by lack of sponsorship.

The event is sponsored by Explore group.Those who have been on the market for a while probably know Matt Lee - he's the one of the best agent dealing with Sitecore opportunities exclusively and always has numerous contract opportunities in his pocket, so if you're planning to find a new contract - it make sense to notify him directly few weeks in advance.

Please join us on Tuesday 29th November from 18:00 at Balls Brothers on Mincing Lane, EC3R 7PP for an evening of networking, learning and of course complimentary food and drink!


Back to blogging after a while

read full post

I am back after a certain period of time that I haven't been posting for a while. So what did I do since that time:

  • Completed my 2-years contract for Vitality Health achieving all the deliverables and left them with a team of high lever professionals I was happy to meet, interview and worked with together.
  • In summer time I have undergone a serious operation (with even more serious preparation process), that kept me out on bench (from contracting) for 4+ months so far. Luckily, all went successfully and I have almost recovered.
  • Managed to attend several Sitecore events, such as SUGCON and Symposium, as well as numerous user groups.
  • Concentrated on Sitecore Link project as it is times more important for the community rather than blog posts.
  • Finally picked up a contract at Cannes Lions Festivals in order to work on challenging tuple of Sitecore and Salesforce.

As all the issues are getting sorted, I am going to pay more attention to the blog having a decent technical backlog of topics to write about as well as drafts started but left halfway that still need to be finished and published. However at the moment Sitecore Link takes all of my free time and even more that that (by taking few hours from sleep). That result an impressive progress and even more interesting thing are coming - follow me in Twitter and stay tuned.

Sitecore Habitat

read full post

Few times I have been already demonstrated a new modular (I'd say revolutionary) architecture approach to Sitecore - Habitat. So my curiosity won, and I started investigating it. Meanwhile, I decided to share in one place all the useful links about Habitat I've managed to find.

What is Sitecore Habitat

As authors say, Habitat is a Sitecore solution example built on a modular architecture. The architecture and methodology focuses on simplicity, flexibility and extensibility. It will empower you with a consistent and discoverable architecture with ability of adding changes quickly and without worry, extensible with new features without steep learning curve.

Habitat is developed and managed by a team in Sitecore Product Marketing with members all over the world (Australia, UK and Ukraine).There are no plans to incorporate Habitat into the Sitecore product, but it will rather serve as a reference implementation showcasing aspect of Sitecore developing. Sitecore is and will continue to be committed to being an open development platform catering for many architectural and DevOps.

Sitecore encourages technical specialists to take part in Habitat. I was shown it for the first time on Sitecore 8 training in London and was amazed by architecture, how things looked differently to what used to have and logical and well-thought at the same time! So, here are some resources I managed to find and share about this project


References to Sitecore Habitat

Anything missed? Please let me know so that I will update the post.

Sitecore Technical User Group UK - January 2016 - Download presentation

read full post

Yesterday I have attended Sitecore Technical User Group in London and would like to share presentations from it. There were 3 presenters, talking about:

1. "CDN with Sitecore" presented by Kamruz Jaman, a Sitecore MVP 2013-2015 and in general one of the most experiences Sitecore architect, who seems to have an answer to any question (StackOverflow). He reviewed know approaches of implementing CDN into a solution in order to reduce bandwidth and improve you servers performance, and demonstrated the most complex - integrating Azure into Sitecore with media items being directly uploaded to the cloud storage,
Download presentation (521.5KB)

2. "Continuous Integration & Delivery for Sitecore" by Jason Bert.
Jason seems to know everything about CI with Sitecore. He stated, that is absolutely doable to achieve a working CI setup with Sitecore, GIT, TeamCity and Octopus Deploy and showed us how-to. Less theory in favor of a practical demo in real-time!
Download presentation (4.4MB)

3. "Sitecore 8.1: new Features and Improvements" presented by Steve McGill.
Steve guided us through serious list of new features and improvements in Sitecore 8.1 - there are so many sweeties I am anticipationg to start working with! At the end of presentation he also discussed Sitecore Habitat - a project bringing modular approach into Sitecore.
Download presentation (2.3MB)

Steve McGill and Kamruz Jaman:


Light of knowledge is coming out of Jason Bert


Thanks to presenters and everyone who has attended!

Final post of the year

read full post

Dear friends,

This is my final post for this year, I will be on holiday from today and till the first decade of 2016. I want to say warm thanks to everyone who has supported and inspired me during last year, say thank you for your feedbacks, they were crucial for me to commit and go ahead.

I wish you Merry Christmas and Happy New Year and will stay in touch!


I join "The Monads" team at Sitecore Hackathon 2016! Which team do you?

read full post

I am happy to join The Monads team at this highly expected event for all of Sitecore Community on Friday January 29th, will be working together with Richard Seal and Justin L, both from USA. This is my first hackathon ever, so I am excited about the event but at the same time a bit worrying. In any case, will do the most of what I can within these 24 hours.

Are you a Sitecore developer? Why not to join the event, it will cost you nothing (except the tome, for sure) but you can get many valuable insights, meet other Sitecore enthusiasts and result having your own module at the marketplace.

You don't need to find people to create a team - just ask for joining any of existing with two people already, like I did.

To go ahead the hackathon please contact Akshay Sura - he is an organizer and will help you with that.

Best luck to all the teams and have fun!

Onero is now updated to version 1.2

read full post

Just have released a new version of Onero. So, what's new?

  • Re-worked UI - removed buttons from main screen in favour of main menu
  • Introduced Testing (settings) profiles - now settings, rules, forms etc. are individual for a profile
  • Created a base for future multiple browser supports (not only FF like now), currently on testing
  • Multiple bug fixes and minor improvements
Please update by the link: http://onero.martinmiles.net/files/Onero 1.2.zip

Looking forward to hear your feedbacks!
Cheers!

Using Onero with non-Sitecore websites - testing Transport for London website

read full post

Introduction

In this blog post I am going to demonstrate how you can test any custom website with Onero Page Runner. For our experiment I've decided to pick up Transport for London website located at https://tfl.gov.uk

  1. Creating a profile for a new website
  2. Populating Pages to process from a XML sitemap file
  3. Configuring Rules
  4. Configuring Forms
  5. Running and getting the results

1. Creating a profile for a new website

Onero configuration is based on testing profile. Using profiles it now becomes possible to create a combination of settings, rules and forms unique for for each individual profile and immediately switch between them just by selecting a profiles from a drop-down on a Settings dialog. Usually you would create a profile for one (or few) websites you would like to test with these settings. For our test we'll create a profile called Transport for London. 

Once created, the new profile immediately becomes active. You may change active profile by selecting a profile name from a drop-down as on a image below:

In fact, a profile is a folder with a profile name located on a drive, with its own combination of settings, rules and forms for submission. Changing active profile simply re-points Onero to use a folder with other settings.


2. Populating Pages to process from a XML sitemap file

On the next step we are going to load the list of pages to be tested. It can be also manually pasted into Page to process textbox, but we prefer to load links automatically from a XML sitemap file. Usually it is called sitemap.xml and is placed at the root of website. TFL website has such a file, and as soon as you specify address of that file into Load from xml sitemap textbox and hit Load Links button, Onero will process request and extract list of all the rages out of it. Sitemap file https://tfl.gov.uk/sitemap.xml references 1,374 pages and all they pre-populate the list, as per screenshot below. Also, as you may see, current profile name is displayed at реу window header.

If you hit Start button Onero will process loading all those pages, measure load timings and generate screenshots of every single page (if checked in configuration for current profile).


3. Configuring Rules

Despite is was already possible to run all the pages at the previous step, we now are going to add additional checks to ensure page is correct apart from it just loads correctly. This can be achieved through adding custom verification rules applicable to a specific (or all) pages. Clicking Rules button on the main window brings you the following dialog with all rules (for the current profile) listed.

Check-box on a screenshot below indicates whether a rule is enabled - only enabled rules are executed. [ALL] / [Incl] indicate a scope of rule execution - this is explained below.


This screenshot shows three rules and all they are enabled. The first one has [ALL] execution scope and thus will be executed on every single page; [Incl] for the second and third means that there are certain conditions that specify where exactly these rules are to be executed. Let's now create and configure these rules.

Rule in fact is a JavaScript code that returns a boolean or integer value. Rules is successful when condition clause returns boolean true or integer more than zero. For example you may return amount of elements satisfying some selector, so if more than one found - rule becomes successful. 
For websites that are run with jQuery you may benefit from writing conditions with its powerful selectors, as shown on screenshots below.

First two rules just return is amounts of element found are more than zero. The last rule return more complex combined condition, that checks if an element with specific id presents on a page and then compares the content of that element with expected message.

Please pay attention to Execution scope dropdown box - the one specifies where the rule will be executes. Three options are:
  • Everywhere - runs on every single page
  • Include - runs only on the pages from URL patterns field below
  • Exclude - runs on all the pages except those satisfying URL patterns field below
URL patterns to match store one oк multiple (comma separated) URL substrings to match. If URL has at least one of these patterns as a substring, Onero will run the rule for that page then. 

Please pay attention to a trailing '$'-dollar sign at the en of second and third patters; '$' means end of string. Thus a pattern https://tfl.gov.uk$ will match only landing page with this URL but does not match https://tfl.gov.uk/about. However, if you remove this trailing dollar sign - it will match all the pages on that domain name (because they all contain that URL pattern as a substring).
You can also delete any existing rules from that screen.


4. Configuring Forms

Similar to the rules, forms have their Forms List window, called by clicking Forms button at the main screen. It looks and functions exactly in the same manner. Double-clicking the form name opens it for edit.

Saying "forms" in his context means ability of Onero to find and populate on specific pages, submit them and analyze the results - whether form submission was successful. The last means that if form submission resulted with a confirmation message on a page - Onero is able to address that message and also check if its content matches expected. Alternatively, if form on a page redirects to a confirmation page, Onero can verify that as well and compare with expected redirect URL pattern.

Forms Editor has three logical sections: General (where to submit), Fields (what to submit) and Result match (how to verify).

URL Pattern works same as in rues - matching substring in URL will enable Onero to find and submit a form on that page.
Fields section set fields to find and populate. Field selectors have same syntax as CSS oк jQuery selectors - if it starts with # then it is ID of element, . specified class name, and omitting starting character will prompt Onero that it's an element tag name. In the last case Onero will ask you to confirm that behavior is desired, as it is less frequently used and very likely to be a mistakenly forgotten '#'or '.'


5. Running and getting the results

Onero updates the links with green / red color depending on results, as it processes them. There is also a progress-bar at the right bottom showing overall progress. 

Double clicking green or red link opens Page results for that specific URL, showing also which rules and forms have been executed on that page and their result codes. This is quite handy for cases when you see a URL turning red and would want to find out why exactly it becomes failed. The screenshots below show Page results for first three pages. You would probably notice different rules executed of each of them - that happens because of conditional URL pattern set previously at step (3).


Previewing results immediately is not the only way of inspecting results. At the end of testing process Onero generated report file with all the statistics for that test run. You may find that in reports.csv file located at Results folder within a folder with current settings profile name (Transport for London in our case). The quickest way to access this folder is to click Settings button from main screen and then Open folder button - it will open resulting folder in a separate Explorer window.

Results.csv spreadsheet contains detailed information about what pages have run and how quickly, what rules and form have been executed and their status codes. If Verbose setting is checked - all the results will be displayed (as on a screenshot below), otherwise only failed will be mentioned in that spreadsheet (that is handy as it prevents from informational noise especially on websites with thousands links and dozens of rules.


First column shows pages being executed, the second - rules and forms run on that specific pages with corresponding statuses at third column. Addons statuses column shows overall status for rules and forms executed and Page Status column shows the statuses for the page itself. They may not match, for example the page has loaded correctly and has Successful Page status, while one of its rules broke resulting Addons status to fail. Time to load shows time in milliseconds taken for page to load, rules and form are not mentioned in that figure.

I hope that quick guide managed to explain some basics of working with Onero and looking forward to your feedback!

How to use Onero with Sitecore

read full post

As mentioned earlier, Onero interacts with Sitecore via Sitecore Item Web API (I also plan to ensure the data from Sitecore Entity Service in future) and this guidance will guide through this procedure step by step. In general, there are 4 major steps:

  1. Enable Item's WebAPI
  2. Creating pages in Sitecore and forms
  3. Configuring Onero
  4. Running and getting the results


1 .Enable Item's WebAPI

Sitecore Web API requires to be explicitly enabled on your Sitecore instance. If you haven't done this yet, enable it at Sitecore.ItemWebApi.config file. You will end up having something similar to below:


        StandardSecurity
        Read
        false

In order to test if Web API works - just paste http://your.host.name/-/item/v1/ into browser and you will get a response:

{"statusCode":401,"error":{"message":"Access to site is not granted."}}

No worries about error message - it is just telling that no anonymous access allowed to you Web API endpoint, which itself is working well and just served this request. Simply changing itemwebapi.allowanonymousaccess to true will return you valid response with data.

Once you paste this list link into Onero and hit Load Links button - you have everything ready o start the test.

When you click Load Links button, Onero calls Item Web API in Sitecore instance and populates Pages to process box with preview links out of the response. At the moment only items in preview mode are available.

More information about item Web API can be found in the official documentation.


2. Creating pages in Sitecore and forms

Now let's go into Sitecore Content Editor and prepare for more complex testing. I have got a clean Sitecore 8.1 just installed instance here. I use Experience Editor to create 2 web forms on Home page (of course, WFFM for Sitecore 8 should be installed as well)

To make things even simpler, let's take two pre-existing forms coming with WFFM package and set first form to display Success Message while the second to redirect to Success Page. Also create a confirmation page located at /Home/thanks to be referenced by Success Page mode and do not forget to publish website to bring these forms and pages into web database. If everything was done correct at this step, page will look something similar to below:


3. Configuring Onero

Now we want to test forms submission to ensure they function correctly. In Onero hit Forms button, then Add New. It will open Forms Editor where you need to set fields and values to submit the form with, also find and assign submit button and finally specify the results so that Onero can verify whether the page has been submitted correctly.


Also do not forget to check. If you want to delete or modify a form - double click its name.

.


4. Running Onero and getting results
While Onero runs, it changes links in the Page to process box to green or red depending on result status:

Clicking each or already processed URL opens Page results dialog, where all the rules and forms being executed on that specific page are listed:

Double clicking a rule or form opens its editor so it is quite convenient to preview and analyze what went wrong:


At the end of testing process Onero generated report file with all the statistics for that test run. You may find that in reports.csv file located at Results folder within a folder with current settings profile name (Transport for London in our case). The quickest way to access this folder is to click Settings button from main screen and then Open folder button - it will open resulting folder in a separate Explorer window,

Results.csv spreadsheet contains detailed information about what pages have run and how quickly, what rules and form have been executed and their status codes. If Verbose setting is checked - all the results will be displayed (as on a screenshot below), otherwise only failed will be mentioned in that spreadsheet (that is handy as it prevents from informational noise especially on websites with thousands links and dozens of rules.
First column shows pages being executed, the second - rules and forms run on that specific pages with corresponding statuses at third column. Addons statuses column shows overall status for rules and forms executed and Page Status column shows the statuses for the page itself. They may not match, for example the page has loaded correctly and has Successful Page status, while one of its rules broke resulting Addons status to fail. Time to load shows time in milliseconds taken for page to load, rules and form are not mentioned in that figure.


Hope this guide was helpful enough!